Enjoy iMessage App on your Windows PC/Laptop: There are many Apple Only Apps which are best in their category and we really crave that we could run those apps on our Windows PC/ Laptop. One such app is the iMessage App. We all are using Facebook Messenger & WhatsApp but the aesthetics and convenience of iMessage App is still unquestionable. Good news is that Windows users can also enjoy iMessage app on their PC/Laptop and this post gonna explain that. So read ahead to get to know as to How to Use iMessage for Windows 10/8/7/8.1/XP PC/ Laptop.
Use iMessage on Windows PC/Laptop
Also check: Top 10 iCloud Bypass Tools to Remove iCloud Activation iOS(iPhone/iPad). There are two methods through which we can use iMessage App on our Windows PC/Laptop. Below we gonna explain both.
The first one requires you to have a MAC Computer with you and the other one doesn’t require any Apple Product but does require an Apple ID to sign in.
Contents
iMessage on Windows 10/8.1 or Windows 7/8/XP PC/Laptop
In this particular guide we will explain iMessage on PC using best ways which we cut down into two ways. Let’s begin the first procedure which using Chrome Remote Desktop to get iMessage on Windows PC or iMessage for Windows 10/8 or Windows 7/8.1/XP/Mac Laptop.
Method 1: Using Chrome Remote Desktop
- For this method you need to make sure that you have a MAC with iMessage and a Windows PC/Laptop.
- Now you’re required to download Google Chrome and its extension Chrome Remote Desktop on both of your computers.
- You can download Chrome Remote Desktop from the following link: Get it Here.
- In case you are unable to find the extension of Remote Desktop or it doesn’t open up automatically on opening a new tab; you’re required to find it in the extension settings of your Chrome Browser and enable it.
- Follow the steps for authorization and accept when it asks you for permissions to run the extension on your MAC.
- Next, it will ask you to share your computer, make sure you click to share it and you’ll get an access code that you have to save to enter into your PC to get you access. It will look similar to the screenshot below.

iMessage on Windows PC/Laptop via Google Chrome Remote Desktop
- Now you can easily access another computer via Chrome Browser or Chromebook. Go to your Windows PC and open up Chrome Browser and follow the initial steps of authorization and permissions.
- Navigate to the Remote Desktop connect page and select to link to a shared computer. From there, enter in the access code you got from above on your MAC and hit connect.
- This way you can easily access iMessage app on your MAC PC from your Windows PC/ Laptop.
- This method gives you full control of your MAC on your Windows PC but the machine is required to be ON for this method to work.
♥♥♥ Video Messenger: IMO for PC Windows 10/7 or Windows 8.1/8/XP/Mac Laptop.
Method 2: iMessage for Windows PC Using iPadian Free Emulator
- This emulator is available for download free of cost from ipadian2.com.
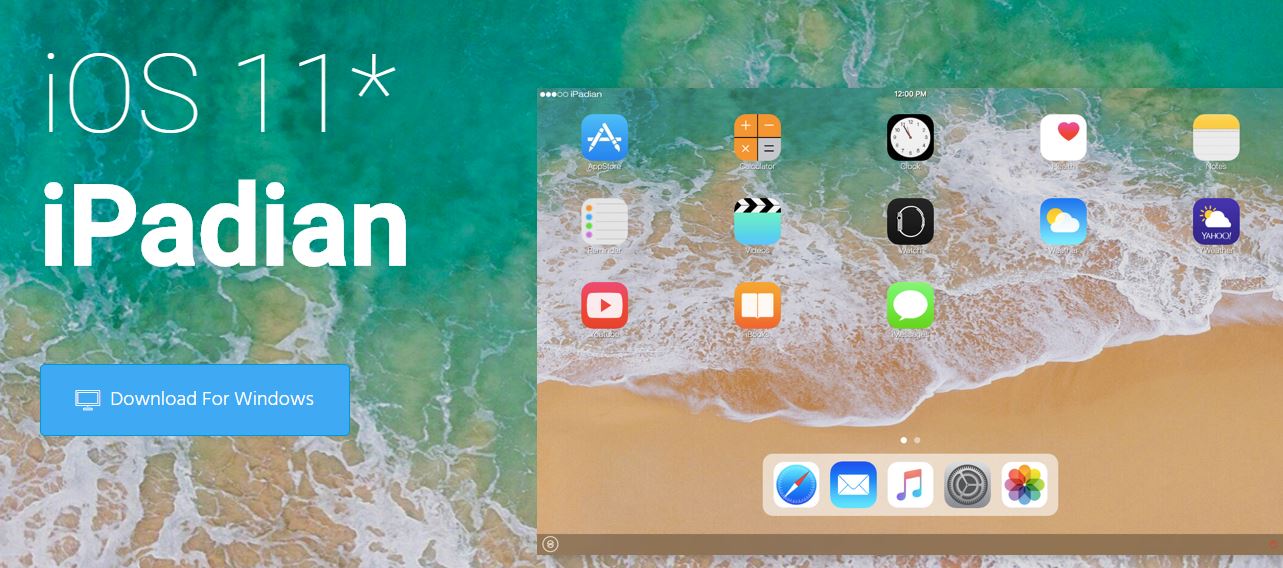
Use iMessage App on Windows PC/Laptop via iPadian Free Emulator
- Download this free emulator and install the .exe file on your Windows PC.
- Once the process of installation is successfully completed you’re required to launch the Emulator.
- Now in the search bar you’re required to search for iMessage.
- Install the app and enjoy on your Windows PC.
- Remember for signing in to the app you’re required to enter your Apple ID and Password.
Alternative Way: You can also install iMessage on PC using Bluestacks emulator which is super fabulous emulator. So, Download Latest Bluestacks Emulator from Here(Updated for Windows 10/7 or Windows 8.1/8/XP/Mac PC/Laptop) and do the same procedure which we used to get iMessage on Windows/Mac PC/Laptop above.
Use iMessage App on Windows 10/8.1 or Windows 7/8/XP PC/Laptop
So folks these were the methods regarding How to Use iMessage for Windows 10/8/7/8.1/XP PC/ Laptop.
Also check out the following cool posts:
- 5 Ways to Bypass Online Surveys for Free, Skip Popup’s & More 2017.
- 3DS Emulator | Download 3DS Emulator for PC, Android, iOS & Mac.
In case you face any issues or you’ve a new way to do the above task then do let us know in the form of your valuable comments below.
Leave a Reply